Showing posts with label From the Kitchen. Show all posts

Thursday, July 19, 2012

Collecting Butter Molds


Remember the antique strawberry butter mold I found this winter? Well, I recently bought him some friends... I think I might now officially collect butter molds.


There is a feathery starburst pattern...


A miniature mold with a tiny flower or thistle design (this one is in my dining room instead of displayed with the other molds in the kitchen).


A shaft of wheat.


And the one that started it all, the strawberry vine. How fun that butter used to be so fancy!


I think the patina of these old butter molds is just as beautiful as the hand-carved designs. Just think of how many (slightly buttery) hands have used it, over a hundred years ago.


They are a beautiful piece of history... and just perfect for decorating my little farmhouse style kitchen!

Thursday, April 19, 2012

Kitchen Inspiration Board

The Rustic White Kitchen

Lately I've been pondering white kitchens. There is certainly no shortage of beautiful white kitchens to admire in magazines and on pinterest, but there's something about it that I've always been a little resistant to. I don't know why. I love white, but I've had this notion that The White Kitchen would always be for someone else. In my own dream kitchen, I would choose a different color (painted cabinets for sure, but not white). But I'm starting to reconsider...

Now, let me be clear, there is no "dream kitchen" in my immediate future. And I am okay with that - I am learning day by day to be wholly content with what I have. But, let's also be clear, if you have the design bug, you won't ever stop decorating! It can't be turned off just because there's no actual room to redo. And thus, I've been pondering white kitchens...

And I've decided that I could easily love a white kitchen if it was anything like the Rustic White Kitchen that I've pieced together above! Simple, shaker style white cabinets, white walls, white windows, and a big white farmhouse sink. Add to that a generous dose of dark rustic wood, through antique tables, cutting boards, wooden bowls, and a big antique wood cupboard to display some white ironstone. And top if off with my collection of antique yellow ware, and a topiary or two. White + rustic wood + yellow ware = what just might be my white dream kitchen.

What does your dream kitchen look like?

(Several of the pictures in my inspiration board are from my own home, and the rest are from my Pinterest boards, along with links back to where I discovered them.)

Wednesday, February 29, 2012

Kitchen Antiques

Ok, I confess... I have a little bit of a "thing" for primitive kitchen collectibles. Wooden bowls, stoneware crocks full of rolling pins and wooden spoons, butter molds, butter paddles, antique yellow ware, bread boards, spice cabinets with little drawers... I love them all. They add so much warmth and history to a kitchen - a room which can easily become overpowered by microwaves, coffemakers, and sleek, shiny, professional-grade appliances (not that my kitchen is in any danger of that last one).
Here's a sampling of some of my favorite kitchen antiques from my own kitchen...


Want to see even more kitchen collectibles? Check out my "Collecting - Wood" and my "Collecting - Yellowware" boards on Pinterest!

Saturday, January 21, 2012

Saturday Morning Oatmeal


My husband and I both love a good bowl of oatmeal. I grew up eating packets of instant oatmeal from the microwave, but as an adult I've discovered that nothing beats slow-cooked, made-from-scratch oatmeal. This paticular recipe has become our Saturday morning favorite. Old-fashioned oats are cooked in a mixture of milk, egg, and brown sugar for a rich and creamy oatmeal that is sweet and delicious straight from the pan, or doctored up with your favorite toppings.  The recipe is slightly adapted from a recipe called "butterscotch oatmeal" that I found on allrecipes.com.

SATURDAY MORNING OATMEAL (serves 2 hungry people)

1 3/4 cup milk (I use skim, as it's what we keep on hand, but use something richer if you like!)
1 egg, beaten
1/4 cup brown sugar
pinch of salt
1 cup old-fashioned oats
Cinnamon (to taste)
1 Tbsp butter to finish (optional)

Add the egg and milk to a shallow saucepan (mine is 2 1/2 quarts) and beat well so that the egg is thoroughly incorporated. Wisk in the brown sugar and pinch of salt. Stir in the oats, and top with a few heavy shakes of cinnamon.


Once all of the ingredients are combined, turn the heat on low and allow the oatmeal to s-l-o-w-l-y heat, stirring often. Be patient. I've done this different ways, and I've found it's best to add everything to the cold pan, and then heat it together slowly. When I've rushed the heat, I ended up with a grainy texture and small pieces of cooked egg instead of the thick, smooth, custard-like consistency you want. Good Saturday Morning Oatmeal takes time!


Heat and stir over low heat until the mixture begins to thicken and bubble - I'd say it usually takes at least 10 minutes or so before it begins to bubble. Continue to cook the bubbling mixture a few more minutes until it is thick and creamy.


The thick, almost-finished oatmeal makes some great deep gurgling, burbling sounds as it cooks.


When the oatmeal looks like this, turn off the heat and stir in up to a tablespoon of butter to finish. Honestly, sometimes I forget to add the butter (like this morning) and the oatmeal is still wonderful, so just leave it out if you're worried about the extra fat. But it does add a nice richness.


Dish into two bowls and eat up! This oatmeal is delicious just as it is, but feel free to make it extra special with your favorite toppings. We've done sliced bananas and chopped walnuts, dried cranberries, or even chopped apples and a little extra cinnamon. Yum!

Monday, January 16, 2012

Antique Butter Mold


I've long admired antique butter molds like this, with their beautiful carvings and smooth worn patina. I've been looking for one to display on my new kitchen shelves, so I was thrilled to find this one at an antique show in town this past weekend. I just love the detailed strawberry vine carving - it's so cute! - and it was in great condition for just $30. These primitive butter molds are quite collectible, and I've most often see them priced at $50 - $80 or more, depending on the condition and design, so I was tickled pink with my find. It now has the perfect new home, nestled between two yellowware bowls above my kitchen sink.


Monday, December 19, 2011

Yellowware at Christmas


On the premise that everything looks Christmas-y when you surround it with evergreens, the collection of antique yellowware bowls on my kitchen shelves got their own small dose of holiday cheer. I just love the smell of fresh-cut Christmas greenery... It reminds me of Christmases when I was a kid, and my mom would bring in armloads of fragrant trimmings from the pine trees that surrounded our house, and tuck them into every little nook and crannie of every shelf and mantle and chandelier around the house. Sadly, my greenery is artificial. And I only have four sprigs of it. Oh, well... At least the yellowware is festive.


I recently struck a deal with my mom and traded her for this wide-banded bowl (above) . I've admired it in her house for months, and last time we were home I had something along that I used to bribe her into parting with it.  I had bought a primitive antique wood checkerboard on the road trip there, intending to sell it in my shop, but it looked perfect on her livingroom coffee table. So we made a deal!


Here is an (iphone) picture of the checker board in the shop. It is so charming and obviously handmade, with separate blocks of wood cut, carved, and painted just right so they all fit together to create the game board. I had to drag myself away from that fabulous green blanket chest, too. So many gorgeous things that don't fit in our little car... Sigh.


But, speaking of road trips to Ohio... it's time to get serious and finish up the laundry, pack up the last few orders that are going out tonight, and get ready for another loooooong drive home. But for Christmas, I wouldn't have it any other way!

Merry Christmas from my home to yours!


Sunday, November 13, 2011

DIY Open Kitchen Shelves


Last Saturday, my husband and I tackled a small DIY construction project in our kitchen. As renters of a basic 1950's duplex, we don't often get to do projects that change the "bones" of the house (nor are we equipped to, either in power tools or hanyman skills). Luckily, these open shelves are about as basic a DIY project as we could ask for-  all it took was a paint brush, a power screw gun, and a trip to Home Depot.

Below is the "Before" picture of our kitchen...


There was a large blank wall above the kitchen sink, almost as if the layout was designed to incorporate a window there. The only trouble is that a window above the sink would overlook our bed in the next room... Oops. So I hung up a mirror and pretended I had a window. But I grew tired of the heavy gilded frame in my farmhouse style kitchen (and tired of watching myself wash dishes), so a couple weeks ago I took the mirror down and started developing a plan to add some shelves.   

And I couldn't be happier with the result!


I wanted the shelves to look built in, so after a little advice from my dad (no use being a cabinet-maker's daughter if you can't get a free design consultation every now and then), I took some measurements and headed to Home Depot.

Here's what we bought:
- One 6' pine board, 1" x 10", which we had cut (for free) into two 34" pieces
- Four small wooden shelf brackets (which were conveniently stocked right next to the lumber. Hmmm, maybe we're not the first people who have done this...)


After sanding the edges of the boards and painting all the pieces, we screwed the brackets flat against the sides of the cabinets, laid the shelves into place, and secured them with screws. Instant open shelves!


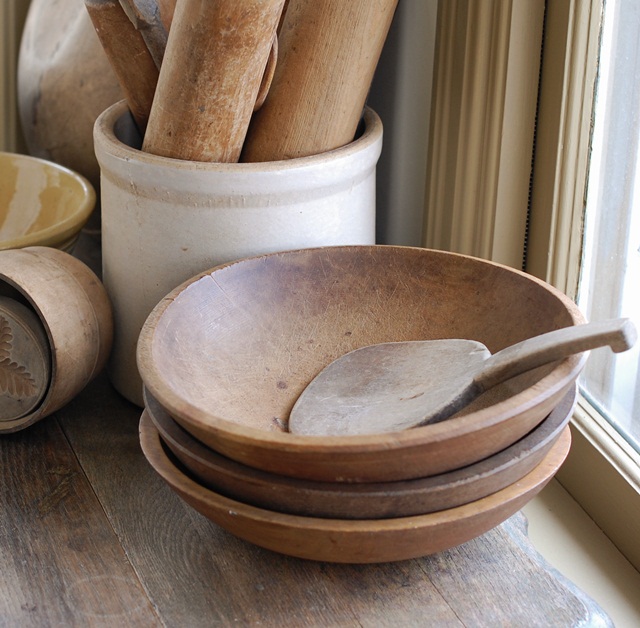
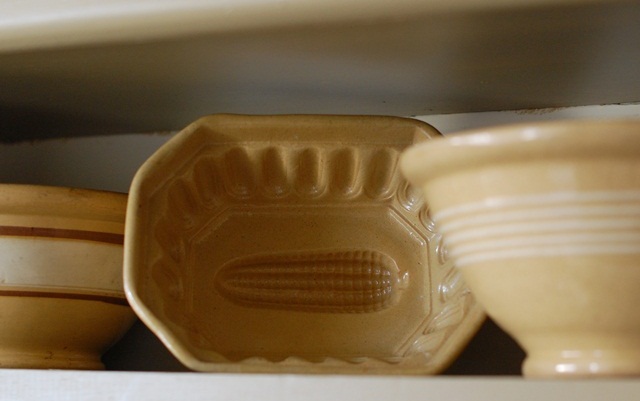
Our small kitchen already had a surprising amount of storage, will lots of full-height cabinets, but it didn't have a lot of room for display. And I am all about display! These new shelves are perfect for showing off more of my antique yellowware.


After this quick and easy DIY project, it now looks as if the kitchen was designed with these open shelves from the very beginning. And the best part of the whole project? It only cost a total of about $16.00! The wood was $8.00, the brackets were less than $2 apiece, and I used the leftover paint from the kitchen cabinets.


Now that is kitchen renovation... renter's style!


Related Posts Plugin for WordPress, Blogger...